Robberg Nature Reserve, Garden Route, South Africa

HIKING ROBBERG NATURE RESERVE

While we were in South Africa, there were so many hikes along the Garden Route we had the option of doing, it was overwhelming in the best way! We had planned on doing three: The Waterfall Trail in Tsitsikamma National Park, the Robberg Nature Reserve, and the Wilderness Heritage Trail. We ended up only doing Robberg and if you only have time for one, this is the one. It was stunning! I also have a post with more information on other options, if you’re interested.

Robberg Nature Reserve, Garden Route, South Africa

Robberg Nature Reserve, Garden Route, South Africa

Robberg Nature Reserve, Garden Route, South Africa

Before setting out I was quite nervous, as I had read it was fairly difficult and maybe not for beginners. It was not technically difficult. There were two steeper bits where a rope is provided for balance, and one point where you’re climbing up a bit vertically, but if I can do it (me, who is terrified of heights) anyone with a reasonable level of fitness certainly can.

Robberg Nature Reserve, Garden Route, South Africa

There trail has three options. The third is the longest, taking you completely around the point, which is around 9.2 km. The first half is much easier than the first, as it’s mostly a well-defined grass/dirt trail. The views are stunning and there are so many families of seals along the way. They smelled terrible but it was incredible to see them just playing in the surf.

Robberg Nature Reserve, Garden Route, South Africa

Robberg Nature Reserve, Garden Route, South Africa

Robberg Nature Reserve, Garden Route, South Africa

The second half was for sure more difficult. There’s a long stretch where you’re moving up and down through big rocks, and we had to slow down quite a bit. That said there were a few locals who were running, so I guess how fast you go is just down to confidence!

Robberg Nature Reserve, Garden Route, South Africa

Robberg Nature Reserve, Garden Route, South AfricaRobberg Nature Reserve, Garden Route, South Africa

The other two route options are shorter and easier – option two brings you around the The Witsand sand dune and gives the option to circle The Island (only accessible during low tide) and is around 5.5 km. Option one brings you to The Gap and is only 2.1 km, but still quite beautiful.

Robberg Nature Reserve, Garden Route, South Africa

It was also one of the most beautiful places I’ve ever been. The colors of the rocks, the sea, and the land were like a painting. Or like I was living inside an Instagram filter!

Robberg Nature Reserve, Garden Route, South Africa

About 75% of the way through, we came to a little beach where we had one of the most refreshing swims ever! There weren’t many people around and it felt like we had discovered a hidden treasure. It’s also where the sunburn to end all sunburns happened. Top tip: if you are on Malarone, never expose any skin to sun, regardless of the amount of SPF 50 you slather on.

Robberg Nature Reserve, Garden Route, South Africa

Robberg Nature Reserve, Garden Route, South Africa

If you’re on the Garden Route and looking for a hike, I highly, highly recommend this one. While there are tons and if we ever go back there are so many more I want to explore, I really do think this was the pinnacle.  If you’re up for an adventure, we passed a little cottage about midway through with an INCREDIBLE view that can be rented for around 55 GBP a night. It’s about a two hour walk to and from, and there’s no electricity, but would be a fairly epic night! You can find more info about that here. (Book way in advance!)

Lion in Kruger National Park

KRUGER SAFARI TIPS

After writing up our Kruger photo diary, I realised I had a lot of tips for practical information while on safari that I want to share.

Elephant in Kruger National Park

To start, I want to talk about guided vs self-drive safaris. As you know, we did two guided tours and the rest we did on our own. As the price isn’t too steep, anyone with a semi-flexible budget can probably do both, and I’m going to outline the pros and cons of each.

Guided

Impala in Kruger National Park

Hyena cubs in Kruger National Par

Pros:

  • You can spend more hours on Safari as guided trucks can leave before the gates officially open and return after they close. They have giant lights installed to search the bush in the dark, and everyone looks for eyes reflecting in the lights.
  • There are more eyes to look for hidden animals. I honestly don’t think we ever would have noticed half the lions we saw were it not for others’ keen eyes. Honestly, the only one we discovered for ourselves was moseying down the road only a few feet away.
  • Guides (and sometimes other passengers) know so much about the animals you are seeing, and having that insight is really valuable and adds to the experience.
  • You have a driver – I think Gareth actually loved driving through Kruger, but the freedom of just sitting back and letting someone else do it all for you is really appealing.
  • Guides have a network of other guides who can let them know where the best sightings currently are.
  • Some tours (not our government sponsored ones) have both a driver and a spotter, and I imagine these people saw LOADS, as our drivers managed to drive huge trucks while spotting the tiniest, smallest animals from quite far away.

Cons:

  • Our second tour was in a huge truck. It fit about 20 people, and was so big and rattley I can’t imagine a single animal didn’t hear us coming from miles away.
  • We were also among about 18 other people who were on their first tour and shrieked every time we saw anything – even our tenth zebra. Everyone is having their own experience and if you’re not with a group who wants to be quite and try to spot the rarer animals, then you’re probably going to miss out on them. I definitely left our second tour feeling like we would have seen more and covered much more ground in our quiet, quick little sedan.

Self-Drive

Giraffes in Kruger National ParkMonkey in Kruger National Park

Pros:

  • We loved the freedom of self drive. It feels so much more special when it’s just you and an elephant right next to your car, or giraffes, or a lion! You also have the freedom to do everything at your own pace, like the time we waited for two hours to try to see a leopard.
  • The drive is an adventure – you can choose left or right, when to turn and when to skip a place, and where to end up. Doing that allowed us to spend time at Lower Sabie and Sakuza as well.
  • While you won’t have a guide or ten other people in your car, you still have lots of eyes looking out. The best tip from Kruger is anytime you see a car pulled over, it usually means there’s something cool to see. We may not have been the best at spotting things ourselves, but people are more than willing to tell you what they’ve found. We also made a point to drive with the windows down, so as you passed other cars you could exchange tips – even if it’s just a thumbs up or down. Guides will also tell you want they know (though are more likely to be in a mood to share if you have any info to trade).

Rhino in Kruger National Park

Lion in Kruger National Park

You can see my pictures here, I made sure to label what we saw on guided vs self guided tours. I think the end result was the same, honestly. I’d recommend a mix of both, but I originally was thinking we’d only do guided tours and I’m so glad we gave self guided a chance. Self-drive allowed us to spend as much time as we wanted in each place and to take breaks just to be in awe of the scenery. We may have missed a few things, but the best moments we had were all when it was just us, and even more magical for the quiet privacy (or the low tunes of Toto’s Africa).

Other tips:

Book Early

We missed out on our first choice, Lower Sabie, because we didn’t book early enough. We almost missed out on our second choice, Crocodile Bridge Rest Camp, but luckily three months was enough notice to get one of the last permanent tents – they still had bungalows available three months out as well.

Lights out!

Each permanent structure has its own little deck, and so many people made the mistake of sitting outside with the lights in their tents/bungalows on. By the time they went in to go to sleep, their spaces had filled with bugs. We were really strict with it – but were one of the only people who didn’t wind up covered in bugs while we slept. I didn’t see any inside our tent the whole time.

Charcoal

This will depend on where you’re staying, but I only realised we’d need this about an hour before we arrived. Luckily if you’re going in via Crocodile Bridge Gate, there is a Super Spar in Komatipoort, which is only like ten minutes from the gate. This is also were we stocked up on food and water, though each camp has a shop as well.

When to drive

Kruger National Park

The animals are far more active in the mornings and evenings. We woke up around half five every morning and came back just before the gates closed every evening. From about 10 am – 4 pm there was much less to see. Still feel free to drive around during this time, but we saw some very disappointed looking people on guided drives in the middle of the day, which would be a real waste of money.

Guide Boards

Map in Kruger National Park

Every camp has a map with that day’s sightings, so if you’re looking for something in particular (leopards and cheetah alluded us!), they can be pretty helpful.

Guided Tours

Safari in Kruger National Park

We considered doing a tour with a different camp that offered a tour with a driver and a spotter, but it ended after the gates locked and we would have been stuck at the wrong camp. Something to consider when deciding where to stay/booking your guided tours.

costs

You can also find our cost breakdown here.

Zebra in Kruger National Park

SAFARI IN KRUGER NATIONAL PARK

Kruger was the best introduction to South Africa. It was the most anticipated, dreamed of part of the trip, and even with sky high expectations, it didn’t disappoint. This post is more of a photo diary, but you can find my tips for going on safari in Kruger here, and a cost breakdown here.

We arrived in Kruger around midday, and spent an hour getting settled in to our home for the next few days. Our tent had everything we needed – even a full-size refrigerator and a wardrobe! It was hot, so the fact that we were in separate twin beds was not as tragic as it could have been.

Permanent tent in Crocodile Bridge Rest Camp Permanent tent in Crocodile Bridge Rest Camp

KRUGER DAY ONE: GUIDED DRIVE

We left a few hours later for a sunset game drive, one of the two guided drives we went on. It was a perfect start to an incredible few days – we saw four of the Big Five on that drive alone! This experience was different (read: better) than our second guided tour. Here, we were in a smaller truck with just 5 other people, who were all experienced and knew so much about the animals we were seeing.

Zebra in Kruger National Park

Continue reading

Lion in Kruger National Park

SAFARI IN KRUGER NATIONAL PARK ON A BUDGET

Before actually planning our safari in Kruger, I thought safaris required years and years of saving and cost thousands of dollars. And that can be true, but a safari in Kruger National Park can absolutely be done on a budget.

Zebra in Kruger National Park

Yes, there are private reserves you can stay at where you’re living in the luxury many associate with going on safari, but there are also government run camps that are quite affordable. The public camps, plus the fact that Kruger allows self-drive through the park, means you have a lot of control over the total cost.

We opted to stay in Crocodile Bridget Rest Camp, in a permanent tent. This was the mid-range option, as you could rent a spot to pitch a tent, or a bungalow. When we arrived and I saw how cute the bungalows were, I felt a bit of regret, but our tent was actually really nice.

Permanent tent in Crocodile Bridge Rest Camp

We stayed for three nights and it was 100 GBP total for both of us. However, there are conservation fees that depend on nationality – people from South Africa pay a much, much lower rate than people from the US or Europe, which I fully support. These fees were more than our accommodation, and were an additional 120 GPB. We booked two drives with a guide, and those were about 20 GBP per person.

Elephant in Kruger National Park

There was a Super Spar just outside the nearest gate, and we used that to stock up on groceries. We ate out a few times, but even with that we spent about 100 GBP on food.

Basically, to break it down for you, two of us stayed in Kruger for three nights and went on two guided game drives for £400 total. Compared to the safaris you see listed for ten times that, we were so pleasantly surprised that it was actually affordable for us.

Kruger National Park

We also rented a car for four days for 50 pounds, which allowed us to do self-guided drives all the other times, which we ended up preferring. We may have missed a few things, but the best moments we had were all when it was just us, and even more magical for the quiet privacy.

I know I’m spending ages talking about the money side of this, but I feel like it’s not talked about enough! That going on safari can be affordable, that it’s something you can possibly do sooner rather than later. It’s so much more accessible than I thought and now that I know I want to do 100 more trips just like this one.

Camels, Giza

Stopover Tour: 18 hours in Cairo, Egypt

Anyone familiar with my 30 Before 30 knows I still have quite a few countries to visit before I reach my goal. South Africa had been #1 on my list for a while, so we decided to take advantage of the double bank holiday and go. And once we realized how easy it would be to have a stopover in Egypt, we couldn’t pass that up!

We decided to fly Egyptair from London to Cairo to Johannesburg, with an 18 hour stop over on our journey down. I was worried it would be too hectic after a redeye the night before, but luckily it ended up being AMAZING and so worth it. I cannot recommend a stopover in Cairo enough.

Giza Pyramids

Before leaving we had booked in with Memphis Tours. We had what felt like the perfect Cairo itinerary. It fit everything in but didn’t feel rushed — ideal when you’ve only got a day. When we first arrived, I may or may not have cried a few happy tears – we were IN EGYPT!

I’d wanted to visit Cairo for years and years but kept worrying it was too dangerous. I wasn’t the only one, as tourism dropped considerably in the last few years. In 2010 about 15 million people visited Egypt; by 2016 that number was 5 million. It’s hit the economy quite hard as tourism accounted for 11% of GDP. Tourism is now steadily rising, which is good for everyone – the locals who work in the industry, but also for travellers, as Egypt isn’t a place anyone should miss. Personally, I felt completely, 100% safe during our time there.

WOULD I GO WITH A GUIDE AGAIN?

Other than one walking tour I did in 2010 in Barcelona, I’d never been an organized tour and was worried we’d miss the autonomy, or feel like the guide was an awkward third wheel. I am so happy to say that’s not at all what it felt like, and instead having Ahmed made the whole thing so much more meaningful. It also wasn’t too bad having someone there to force G to pose for pictures!

The Ministry regulates tour guide certifications, and  requires guides to pass licensing tests in Egyptian history, local museums, cultural attractions, and at least one foreign language. As we only had 18 hours, having someone with us who could explain the history behind everything was invaluable. It also allowed us to ask a lot of questions about life in Cairo, and in 18 hours we might not have gotten close enough to another local to get that insight.

Because we had such limited time (and knowledge), a guide was definitely the right choice for us. I’d feel comfortable without a guide, but in a place with such a rich history I could definitely see booking another tour when I go back to explore a different part of the country.

ITINERARY

1.  THE PYRAMIDS

Giza Pyramids Giza Pyramids Giza Pyramids
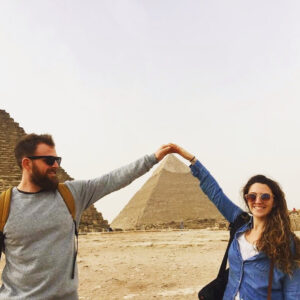
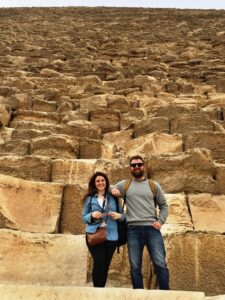
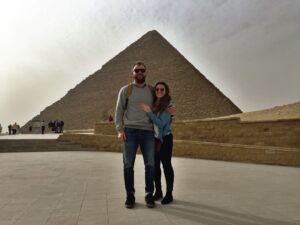
I’m going to really show some ignorance here, but I thought it took hundreds of years to build the pyramids. Apparently it was more like 20 years for each one. The Giza pyramids were built by one ruler, then his son and grandson. Each was a bit smaller than the previous out of respect, and there are smaller pyramids that were built for wives and mothers. Because all the pyramids look the same from the inside, we went into one of the (free) smaller ones. As it was less popular, we had it all to ourselves! This was great because getting down was actually much more scary that I had imagined – it’s really narrow and really steep. It would have been easy to feel claustrophobic had it been more crowded.
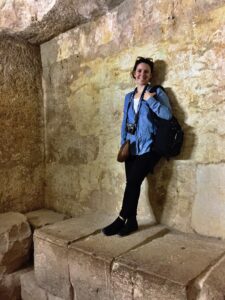
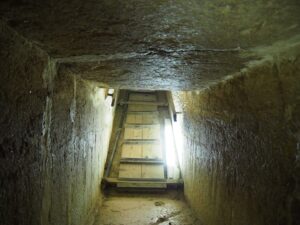
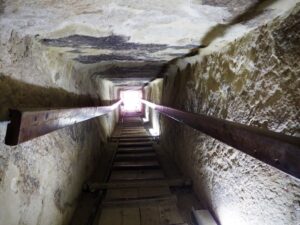
Giza Pyramids

Giza Pyramids

Giza Pyramids

2. THE SPHYNX

Great Sphinx of Giza

Giza Pyramids

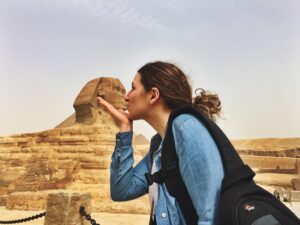
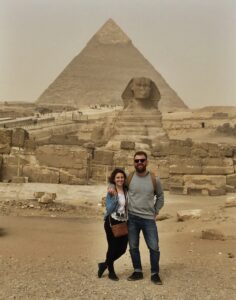
The Sphynx was erected  around 3000 BC for the pharaoh Khafra, who also built the second pyramid. The nose was carved off by a Sufi Muslim man who disapproved the of iconoclasm, and he was hanged for this offense.  Not much else is known, but wikipedia has some cool images of the Sphynx from the 1800s when it was still half buried in sand.
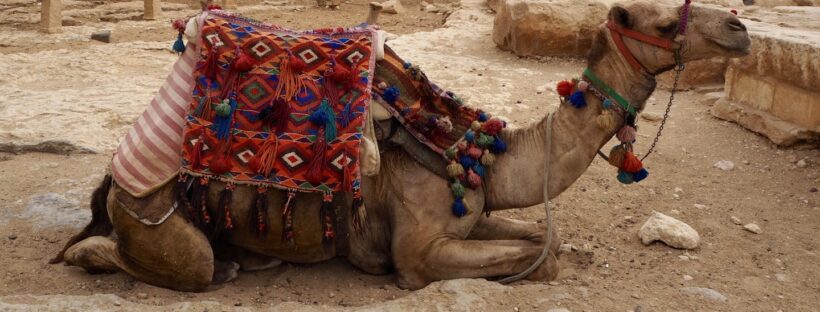
3. CAMEL RIDE!

Camels, GizaCamels, Giza  Camels, Giza

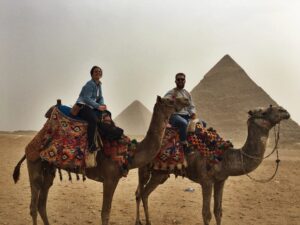
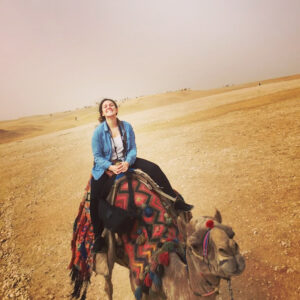
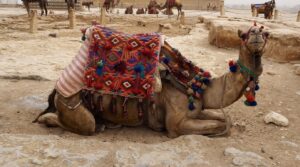
This was such a cool experience. I remember first learning about the ancient Egyptians in school, and I NEVER imagined that one day I’d be riding a camel through the Sahara to the Pyramids. And yet, there I was! On a surprisingly wobbly, tall camel, making our way through the desert. I was really into it.

4. FELUCCA

Nile cruise, Cairo

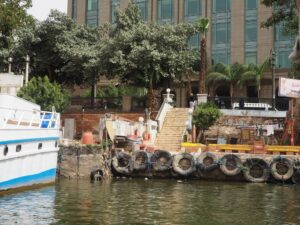
We had the boat to ourselves and cruised around the Nile for about 45 minutes. Again, 7 year old Kristen’s head would explode.

5. SHOPPING

The one part of the tour I didn’t love were the shops. They weren’t presented as shopping as much as we were told we’d be taken to see how Papyrus was made, and after the demonstration it was incredibly clear we were then meant to buy something. The shopkeeper followed us around, and once we made our choice (around £30), was clearly angry we hadn’t spent more. The guy at the next store was less aggressive, but it still felt like we were completely obligated to make a purchase. This part of the tour was optional, so after the second shop we just opted out.  I understand tourism is suffering, so tried not to be too put off by the aggressive expectation that we drop some serious cash.

6. EGYPTIAN MUSEUM

EGYPTIAN MUSEUM

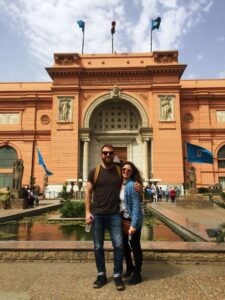
This museum was incredible! It housed SO many treasures, it would take days to go through everything. However, Ahmed knew exactly where the most important stuff was, and gave a thorough history of everything we saw. The highlight was King Tut’s tombs and the artefacts found inside. Did you know that Egyptian pharaohs were buried with everything? And I mean everything — beds, chairs, cats, cows, you name it, and it’s there.
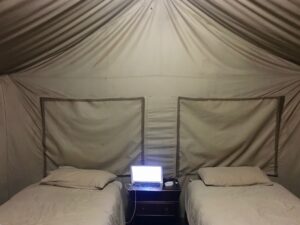
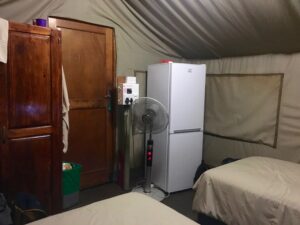
7. HOTEL

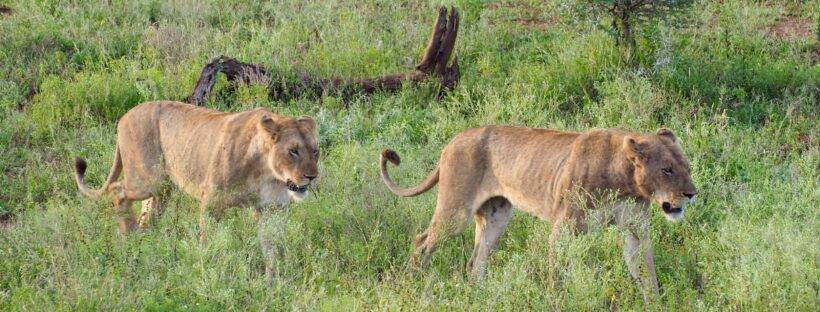
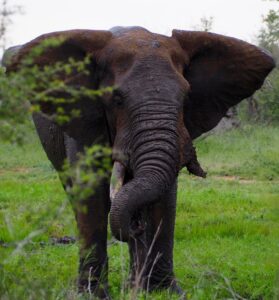
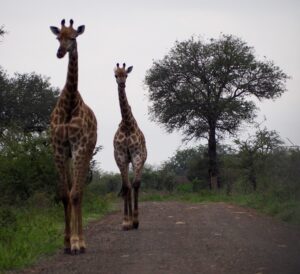
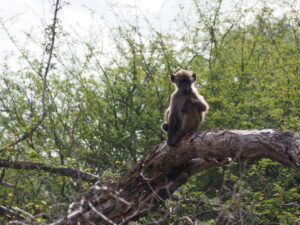
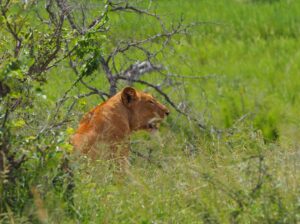
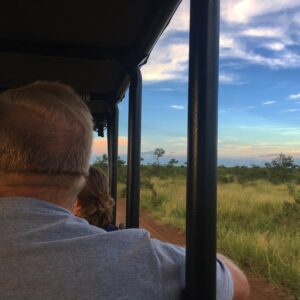
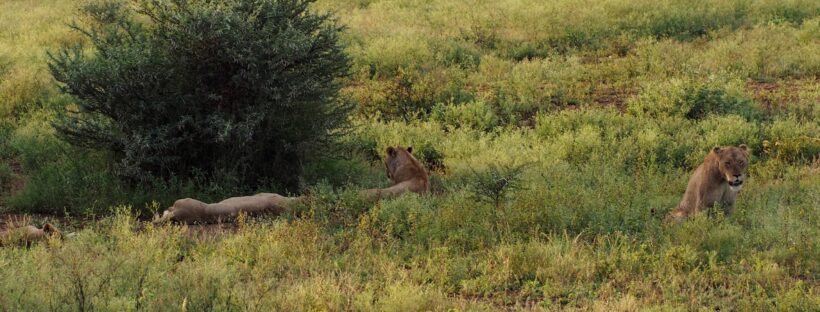
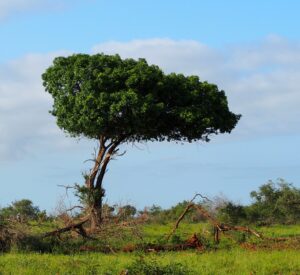
Do not book an 18 hour stop over without also booking a hotel. We didn’t but by pure luck our airline gave anyone with an 8 hour or more layover a free hotel room. Originally the plan was to land at 5:00 am, “do Cairo,” and depart at 23:30. Without the hotel that would have been terrible, and I’m so happy Egyptair saved us that experience. After our tour we were exhausted, so we had a shower and went down to our free buffet dinner, also provided by Egyptair (as well we breakfast and lunch, what!). We flew out that night for our next adventure: a safari in Kruger!

My first Egyptian excursion was wonderful, but not nearly long enough. I can’t wait to go back!

Robberg National Park

THE PERFECT TWO WEEK SOUTH AFRICA ITINERARY

This Easter, Gareth and I were lucky enough to spend two weeks in South Africa. It was by far the most exciting and adventurous trip I’ve ever taken (I cried tears of happiness two different times!), as well as the farthest from home.

We had 13 packed days in South Africa (and one day in Cairo!) and while it’s impossible to do everything in 13 days, I put hours and hours into researching the perfect itinerary — all that hard work paid off, because I think I did it!

In the coming weeks I’m going to post about each of the five sections of the trip in detail, but here I’m going to share the basic itinerary. Having only two weeks meant some things had to be left off, but I think we fit in a great mix. Each of our five segments felt very different — because of that by the time we came back to London two weeks later, it felt like we had been gone for months and been on five completely different trips.

Cairo

Day 1

Camels, Giza

We took a red eye from London to Cairo on Egypt Air. While there were cheaper options, this one allowed me to build in an 18 hour layover, which was enough time to do a great tour of the city. While one day is not nearly enough to cover Egypt, it did feel like we saw nearly every major tourist attraction in Cairo itself.

Kruger

Days 2 – 4

Jumping Rhino, Kruger National Park

We landed in Johannesburg at 5:00 am on the second day of our trip. We had a car rental ready and waiting, and drove the 4.5 hours to Crocodile Bridge Gate, which was the nearest to our camp. We did an evening game drive our first night, and sunrise and sunset tours days three and four. I have so many tips and recommendations about Kruger, as well as a cost breakdown – it’s more affordable than you may think! I think this was the best part of our trip — it was so magical, and completely unlike anything else I’ve ever done. We had three nights and nearly three full days there, and while I would have loved to stay longer I didn’t feel rushed or like we didn’t have enough time to have a real safari experience.

Garden Route

Days 5 – 8

Robberg National Park, South Africa

We left Kruger at 4:00 am day five and drove back to Joburg airport to catch our flight to Port Elizabeth — and started the Garden Route! The Garden Route runs from Storms River to Mossel Bay, and while we only stayed in Storms River and Knysna, we did activities in each of the stops along the way. We had four days and three nights for this part of the trip, and it was so fun to move from place to place, making each day its own new adventure. During this trip we did one of the best hikes of my life, ziplined, kayaked, cliff jumped, ate some really good food, and drove through some astounding landscapes.

Franschhoek

Days 9 – 10

Franschhoek wine tramp

Wine region! During planning, we went back and forth on this — having lived so close to Santa Barbara and in La Rioja, I wasn’t sure taking a few days out of our trip to go on wine tastings would be worth it. I’m so so glad we went! We had planned on Stellenbosch, as I had heard the name thrown around much more often, but Franschhoek is like its cuter, smaller little sister and was an oasis in the mountains. Plus Franschhoek has a wine tram! Need I say more??

Cape Town

Days 10 – 14

Bo Kaap, Cape Town

Day ten was really just the journey from Franschhoek to Cape Town (we stopped in Betty’s Bay to see the penguins, and took a longer route along the coast which was so. worth. it). Cape Town was incredible. It was one of the coolest cities I’ve ever been to, and I absolutely need to go back, hopefully for much longer — though not because I feel like I missed any major tourist attractions (minus one).

We did so much — a walking tour of the city, climbed Table Mountain (it was so hard, but so worth it), went to Bo Kapp, ate at some amazing restaurants, went to The Waterfront, hung out in Company’s Gardens, shopped along Green Market Square, and had dinner in a Township. Cape Town was the first place we really had time to just wander and take everything day by day, and it was welcomed after the packed schedule we had leading up to it. It was the perfect, chilled end to an incredible trip.

Like it said, there’s no way to do absolutely everything, and there are some things not on this itinerary that others may no be willing to skip — we didn’t go shark diving because I don’t think after that I’d ever get in the water unless I was still in a cage. We didn’t to Addo or an Ostrich Park because we had seen so many elephants and ostriches along the way. But in the detailed posts I’ll explain where and how you can do these things and give as much information as we can!

Coming back to London we were welcomed with a week straight of predicted rain. So far, that has been accurate. While I miss South Africa and really want to go back some day, I feel so grateful for the trip we had. It gave me some much needed headspace, and I feel excited for the coming summer here in London — maybe there will even be some sunshine!!

Italian Flag

HOW I GOT ITALIAN CITIZENSHIP (AND HOW YOU COULD TOO!)

Today is a year since I was notified my Italian citizenship application went through. I posted that it happened, but gave very little further detail. As it was a huge life moment, it’s beyond time I posted about how I became recognized Italian Citizen (and how potentially you could be too!).

I think perhaps the best way to start would be to go back to the beginning. It was 2010, I had just come back from studying in London, and was desperate to get back to Europe. It was my first time out of the country, and I had loved London, and my visits to France and Spain.

I did some research and quickly discovered I didn’t qualify for Irish citizenship, as my great grandmother was born there and it only allows you to go back to grandparent. (My mom, however, did qualify, and she’s in the process of applying as well!)

Then I looked into Italian citizenship jure sanguinis (by blood) and lo and behold – there was no generational limit! There were some other requirements though—my qualifying ancestor couldn’t have renounced his Italian citizenship (aka become American) before the next person in my lineage was born—otherwise he wouldn’t have had the citizenship to pass down to his child, my great grandfather. Yes, that’s right—I qualify because my great-great grandparents were born in Italy. It’s a tenuous claim, but a legal one nonetheless. Other sexist technicalities include a woman not being able to pass on citizenship prior to 1948, however this is never upheld in court, so if you fight that you’ll win.

My first step was getting my great great-grandfather’s immigration paperwork from USCIS/NARA. It took quite a while to come, and wasn’t cheap, but when it finally arrived I had confirmation that I qualified for citizenship—Giovanni (my great great grandfather) declared his intent to naturalize in his 70s, but died before he could ever finish the process. Either way, my great grandfather was born well before the declaration of intent, and therefore the citizenship was passed, unbeknownst to us, “by blood” right down to me, born almost 150 years later.

Another requirement to note that is your ancestor must have been born after Italy became a country, which didn’t happen until 1861. My great-great grandfather came a bit close to this date, but was born in 1866. Lucky me! I’m the first generation that can really go back so many generations—my parents’ great-great-grandparents were all born before Italy existed—which I think confused the man who runs the Italian consulate in Boston. The first time I called, he told me I didn’t qualify and couldn’t go that far back.

After getting the naturalization paperwork and confirming I was eligible, I began collecting documents. Exactly what you need varies from consulate to consulate, but I applied in LA and needed:

  • My great, great grandfather’s birth certificate – from Italy
  • My great, great grandmother’s birth certificate – from Italy
  • My great, great grandparents’ marriage certificate – from Italy
  • My great, great grandfather’s death certificate – from MA
  • My great, great grandmother’s death certificate – from MA
  • My great grandfather’s birth certificate – from MA
  • My great grandmother’s birth certificate – from MA
  • My great grandparents’ marriage certificate – from MA
  • My great grandfather’s death certificate – from MA
  • My great grandmother’s death certificate – from MA
  • My grandfather’s birth certificate – from MA
  • My grandmother’s birth certificate – from MA
  • My grandparents’ marriage certificate – from MA
  • My grandfather’s death certificate – from MA
  • My father’s birth certificate – from MA
  • My mother’s birth certificate – from MA
  • My parent’s marriage certificate – from MA
  • My birth certificate – from MA

After collecting everything, I needed to get all the certificates not from Italy Apostilled and translated into Italian. Not exactly cheap!

At my appointment with the LA consulate in December of 2014, I was accepted, paid my fee, and was told to expect to hear back five months later, in May of 2015.

Many, many months passed, and finally I heard back in May of 2016 that I was retroactively rejected. To be honest, I wasn’t completely surprised—I had a lot of errors in my application. My great grandfather was called Secondino Negrotti, Secondo Negrotti, and Andrew Negrotti on different documents. My great, great grandfather went by Giovanni, Joseph, and John. Dates didn’t match, spellings changed. But, I had expected to be denied back in 2014, meaning I could begin working on corrections. Instead two years went by and suddenly I was back at square one. Only worse, because I was halfway through year two of a long distance relationship and beyond ready to move to Europe.

I hired a lawyer to make the changes. The case was rejected, my lawyer took a few months off from responding to my emails, and finally on Christmas day 2016, I heard she’d gone back to court and had success! I had the changes I needed and a much stronger case. I sent the court order to the LA consulate and on March 21st at around 3:00 am Spain time, I saw an email with the subject: ITALIAN CITIZENSHIP.

It had happened!

For anyone who is also thinking about applying for recognition of their Italian Citizenship, please see my tips and advice below.

  • As soon as you decide to start the process, step number one should be making the appointment at the consulate. These appointments are a year+ out at nearly every consulate, and it would be incredibly rare for it to take more than a year to gather everything (unless you need to make amendments, which can take a while).
  • The next step should be getting the naturalization paperwork, as this can take a few months. I ordered through both NARA and USCIS, as I wasn’t sure exactly how it worked, and they both sent me copies of the same documents, however NARA was much faster and the copies were much, much clearer. So in my experience, they are the better option.
  • At the same time, you should reach out to to your ancestors’ comune in Italy. There is a template you can use on the Facebook page, in case you don’t speak any Italian. I used that and google translate, and had a fantastic time with my comune. They sent me multiple copies of everything after I had some paperwork accidentally destroyed, each time for free.
  • A huge and costly mistake I made was getting all my vital records from city hall in my hometown. These versions aren’t accepted–they need to come from the state records (most people use Vitalchek to order them, but it’s quite expensive).
  • You can only have records Apostilled in the states they are from, another mistake I made. Give this a few weeks, as if you’re mailing it in it can take quite a while.
  • Make sure you use a translator that is approved by your consulate.
  • For more information about how to obtain Italian citizenship, go to your local consulate’s website. Additionally, there is a Facebook group which is an amazing resource—I don’t know how anyone could DIY it without them.

Please note  that this was just my experience from the requirements in LA. In 2015 they made me produce all my non-linear records, which weren’t required in 2014, though they didn’t need to be translated or Apostilled and could come from city hall. But requirements vary massively from consulate to consulate, and can change from one month to another.

All in it cost me about $ 3,000 — the application fee is 300 euros, the documents and Apostilles were about $700, and the legal fees were about $2,000. If your case is easy, with few documents and no errors, it could come to much less. If you apply within Italy using a service, it’ll be at least 1,000 more. Though at the time spending the money was incredibly stressful and felt quite risky, looking back I feel confident saying it was the best $3,000 I’ve ever spent in my life!

River Arno, Pisa

PISA AND (FINALLY!) GETTING MY ID CARD!

A few months ago I had my first interview at my current job, and left it so (unusually) confident, that I arranged a spur of the moment flight to Italy for the next day, as I knew if I was hired I’d need my proof of right to work in the EU. I had originally planned to get it a few weeks out, and fly into Milan, rent a car, and drive out to the tiny mountain town my ancestors were from. However, with one day’s notice, Pisa ended up being much cheaper, and was about the same distance as Milan. It was also quite close to Cinque Terre, and this unplanned, last minute trip became one of my all time best travel experiences.

I flew into Pisa and stayed at Hostel Pisa. It was walking distance from the airport, and can I just say any city where you can walk to the airport is OK in my book. I was only spending one night in Pisa, and didn’t arrive until 4:00 pm, so my expectations weren’t high. However, I had the best night. I don’t have major Pisa recommendations, other than the tower, obviously, and the most fantastic dinner/drinks place.

River Arno, Pisa

I headed straight for the tower because the light was fantastic and I wanted to see it in all its glory. While there I asked two girls to take my photo, and they recognized me from checking into the hostel. They were returning home to Germany a year volunteering at in International Hospital in Jerusalem, and we also joined up with a guy who had just arrived in Europe for a year abroad in Florence.

Leaning Tower of Pisa Leaning Tower of Pisa

On the walk to the tower I had stopped to take passport style photos for my ID card. (They did not come out well—Gareth kindly pointed out the shading makes it look like I have a five o’clock shadow, which is an accurate analysis of the photo). Nearby, I saw a dock on the river that looked like it may be a restaurant. I mentioned it to the crew I had met, and we decided to head there for dinner. It ended up being such a lovely night. Two of us were heading home after a long journey, both to graduate school. One was arriving for the first time in a country he was about to make into a home, and I was there to get proof of my newly recognized European citizenship. Arno Vivo was half on a dock and half on a floating raft, where we grabbed a table. There was live music, mood lighting, and the buffet style food was free with a drink. We shared a bottle of wine and swapped travel/life stories, and it was one of those moments that reminds you how absolutely wonderful travel can be.

Dinner on river arno, pisa

The next morning I walked back to the airport to pick up a rental car, and headed out for Vernasca. I was so nervous the whole drive, that they would be closed (our communication was all in Google-translated Italian, and I wasn’t confident they’d be open until I arrived), or that I didn’t have the proper documentation. It seemed too easy, honestly, after the process leading up to it had been so drawn out and difficult.

The drive was beautiful, through the mountains and farmland, and the little village was so cute.

Vernasca, Italy Municipal building

I headed straight for the municipal building, and there was one woman working behind the counter. She was expecting me, and we chatted away—her in Italian, me half in Spanish and half in hand gestures. She filled out my ID card right there (so easy, it’s just made of paper!), and handed it to me with a big hug and a congratulations. It was such a surreal moment, being in my ancestors old village, even being in Italy, and I’m honestly so grateful that’s how I received my ID, rather than at a consulate in LA or London. Afterwards I wandered around the town a bit—there’s a big church up a hill right behind the municipal building that offered incredible views. It was insanely cool to get to explore the place Giovanni and Maria were from before moving to the states, and I’m so glad I was able to.

Vernasca, Italy Vernasca, Italy Vernasca, Italy Vernasca, Italy Vernasca, Italy 
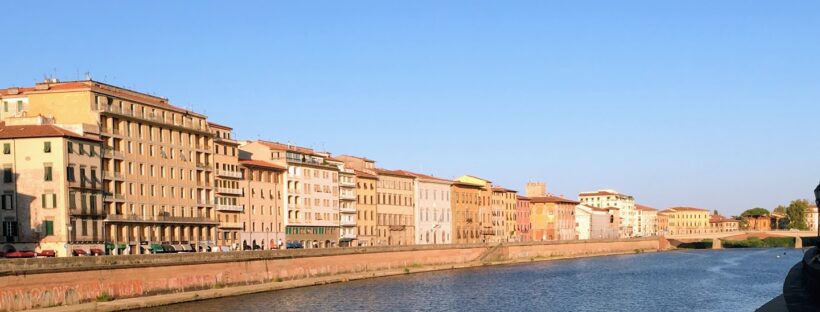
I was eager to drop the car off because that night started the second part of my trip—Cinque Terre!

30 before 30 State of the Union

Well, it’s been a minute since I’ve had an update to the 30 before 30 list. This year I didn’t accomplish as much as I had hoped, but I did get a major one out of the way—I am officially a recognized Italian citizen! And I’ve visited Italy not once, but twice, going to Florence, Venice, Pisa, Vernasca, and Cinque Terre!

As we’re past the midpoint to thirty (how on EARTH is time moving so quickly?!), I figure a little check in is in order. The remaining items on the list are:

6. Visit Buenos Aires
7. Visit Costa Rica
9. Visit South Africa
10. Visit Greece
11. Visit Egypt
12. Work in the field in Africa or Asia
13. Stay in Shakespeare & Co Bookstore
15. Fix my tooth
17. Be able to cook 5 meals very well
18. Do a pull up
20. Live in France
21. Learn French
22. Reach a B2 level in Spanish
23. Get my masters
24. Get published
25. Read 10 books every year
30. Go to a Patriots game

So! We have 17 items left and just over two years to go. Because this list is about focusing on what’s important to me, rather than doing something just because 25-year-old Kristen thought it sounded nice, this list is ever evolving. As a result, some of these things just aren’t that important to me anymore. For example, items 15, 17, and 18. I don’t much care about fixing my tooth, and Gareth cooks for me so I’m eating just fine without any culinary skills to call my own. Also I just don’t care enough to put in the work needed to be able to do a pull up. Oh well.

Gareth and I recently booked tickets for two weeks in South Africa, with a day layover in Cairo! I’m so excited, it’s definitely the most adventurous trip I’ve ever planned. I can’t wait until the end of March!

We’re also planning on spending a week in Greece this summer, so that’s three of the final five travel related ones done already!

My New Year’s resolution is to pass the B2 DELE Spanish exam, so that should hopefully happen this year, and I’m organizing French lessons through my work. I’d like to be at an A2 level of French by the end of the year as well.

I’ve easily read 10 books a year. That one I wrote back when I was crazy busy working on Marco Polo, and hadn’t read a book in what felt like years. I got the 10 in each year while living in LA and have read many times that each year since I left.

As for getting published, to be honest I write less now. However, last year I worked for a travel magazine for a few months, and had a few articles put on their website, so in theory this one is finished—but now I’m being selfish and want it in print. I ended my time there when Gareth’s mom got sick, but still keep in touch and think it would be quite easy to get something published in their print magazine. That’s something I’ll try to do this year.

So, those are the ones for which I have a plan. Others have a much less defined plan, like living in France and the masters. Not to say I’m not working towards them, more that they are less in my control.

The rest, I’m less sure about. I have no idea when I’ll go to Buenos Aires or Costa Rica (except, mom, maybe next Christmas?!). Staying in Shakespeare & Co will tie into the next time I’m in France (see above), and volunteering is something I still quite want to do, but finding the time is proving difficult. Over the summer I applied and was accepted to lead a group of volunteers for three months in Tanzania from January-March of 2018, but had to turn it down for a variety of reasons.

I think that leaves just the Patriots game, which is becoming more urgent as I am desperate to see Tom Brady play before he retires. I might try to go this Christmas Eve, but if not it’ll have to wait to next year (though I’ll be in Boston for 10 days in the fall of 2018 for weddings, so it could be then barring serious injury/knock on wood/Go Pats!/etc).

Italian Flag

IT HAPPENED

Are you ready for this?

I’m here with the update I never thought I’d get to write. I honestly still can’t believe it, and I think it will be a while before the reality truly sets in. But as of Tuesday night, I am officially a recognized citizen of Italy.

To be honest, this whole process became a bit of a nightmare. I had serious doubts it would ever get done, and was sure I was years away from any progress. Then Christmas happened, and while I suddenly felt sure it would happen at SOME point, the missing middle name correction was something the LA consulate had rejected plenty of people for in the past. I expected to need another court order. Because obtaining a court order takes a lot of work, time, and money, and I figured I should at least give what I had a shot. What was a few more months in the years this has taken? I’m so happy I did! I feel like as soon as I stopped stressing about it, it happened. NOT to say that had I stopped stressing before it would have worked, because it took a LOT of determination, commitment, and belief to get to this point.

From my research on the consulate, I was expecting to hear back sometime around now. So when I got an email at 1:00 am with the subject line ITALIAN CITIZENSHIP, my heart stopped for a second. The email was so short, I had to read it multiple times to understand. Like it couldn’t possibly be official. Do you remember when I got my first email with the huge list of problems that needed correcting? I didn’t read that one carefully enough, and mistakenly believed it had gone through. But this one was different. It was maybe three lines, most of which explained how I could obtain a passport. A EUROPEAN PASSPORT.

This means I can stay in Europe as long as I want, and I can get a proper job. It means no one can force Gareth and I apart (um, until Brexit happens). It’s weird because I have very little connection to Italy. Other than my love of the food, I´ve never been there (though give me a few weeks!), I don’t know a word of the language, and even my actual genealogy isn’t very Italian. The true value of this passport is Europe. I can stay in Spain for as long as I want. I can move to France. I can live in the UK. I suddenly have 28 more countries in which I can legally work. The amount of languages I can study, cultures I can get to know, and food I can try has just increased by so much! Also a lot of places in Europe have nearly free or actually free masters programs. So, that´s also a PRETTY big plus.

I can’t believe it’s over, but WOW, am I happy to cross #1 off my list!