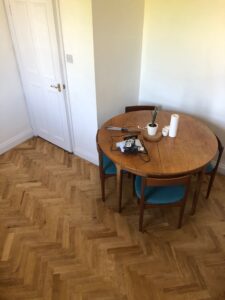
When we moved in we had a list of changes we wanted to make sooner rather than later. One that I really wanted to do was pull up the lino kitchen floors and put in herringbone parquet. The only way we’d be able to afford this would be to do it ourselves, and after some trial (and definitely some error) we are so pleased with how they turned out!
The Baseline
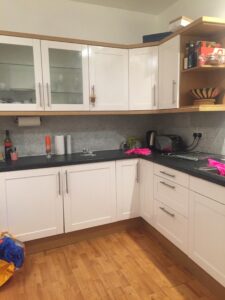
Not terrible, but none of it was really to our taste. And once we started on the floors things kind of ran away from us and we ended up completely redoing the entire kitchen! Lockdown gave us too much time so scheme. This post will only focus on the floors however, so read on for more details below!
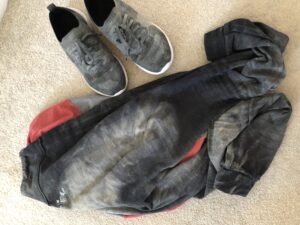
We started by gathering supplies. I got 99% of the list from Rachel of ohnorachio. Had I not found her blog I’m not sure I’d have been brave enough to attempt the DIY!
What we ordered:
- Unfinished Parquet Oak Wood from Direct Wood Flooring. They don’t have our exact kind in stock anymore (ours wasn’t tongue and groove – but that might work even better).
- Wood Bond – to glue the wood to the floor
- An adhesive scraper for the wood bond
- Wood Glue to mix with the sawdust and fill the gaps
- A plastic scraper for the wood glue
- Mitre box
- Belt sander and/or orbital sander
- Goggles
- Mask
- Natural Bristle brush for the oil
- Osmo oil – we tried it in honey originally and did not like the finish so we re-sanded and used transparent which we much preferred.
First steps
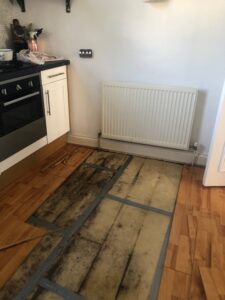
We ripped up the lino and found a ton of mould. As an American I freaked out because we are taught mould is a disaster and very dangerous, as a Brit Gareth scrubbed it up without gloves or a mask and just got on with it, ha. We then covered the floor in sheets of plywood to level things out. If you do the same make sure to countersink the screws so there aren’t higher bits that will bump up against the parquet.
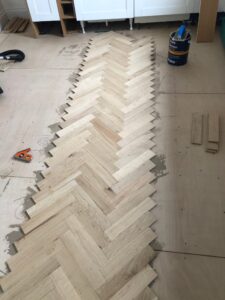
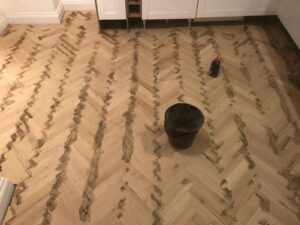
Laying the floor
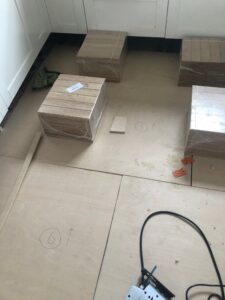
Spend a long time figuring out where you want the midline to hit and make sure the first row of pieces are in straight, as everything builds off of these and if they aren’t right the wonkiness will just get more and more noticeable. Then you just lay them in – we did as much as we could before needing to make cuts, and let those dry overnight.
Making the cuts
This is where the mitre saw and one of those angle measurement tools will come into play. I left this to Gareth as we only had one saw, and it took about two days to get all the edging done.
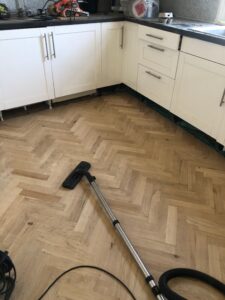
Sanding
You sand and sand and then you sand again. And then again and maybe again. The biggest mistake we made was not putting in more effort to contain the dust. It spread over our entire flat – the entire next floor included. It was shocking. We learned from this and when we re-sanded to change the finish we closed all doors and blocked them all with damp towels which really helped.
We started with a 40 grit sand, then a 80 grit. Then we mixed a bunch of the sawdust with the wood glue and filled in the gaps between the pieces to help give it a better seal. We left this overnight and the next morning did another sand at 80 grit, and then one more at 120 to give it a silky finish.
The finish
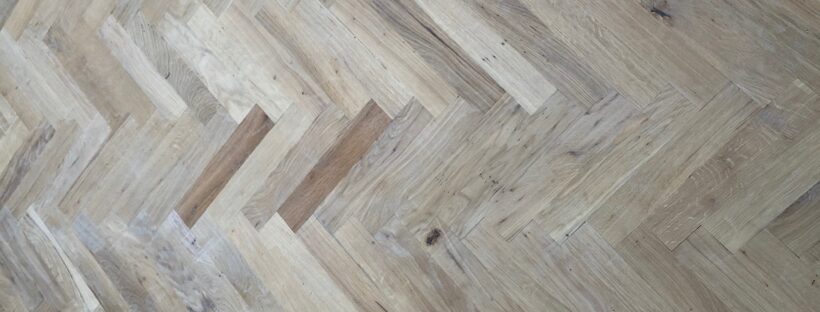
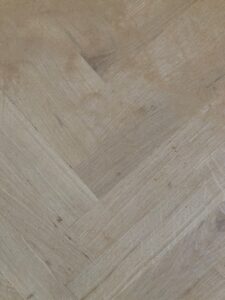
We made a few mistakes here. We didn’t properly test the colour before doing the entire floor, so we woke up to a much darker colour than we had envisioned. Because we didn’t love the colour, we only did one coat, which the instructions said would be fine, but within days we had water stains all over the floor. The honey finish was lovely, it just didn’t look right in our space:
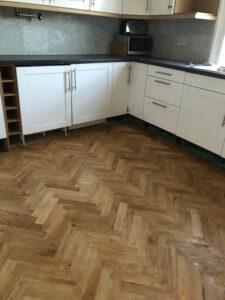
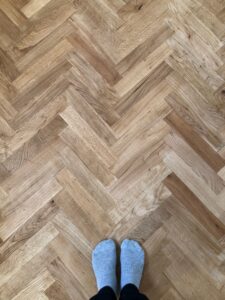
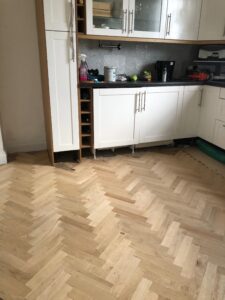
We eventually re-sanded and used a transparent finish and applied two coats which worked much, much better. We love the way this turned out. 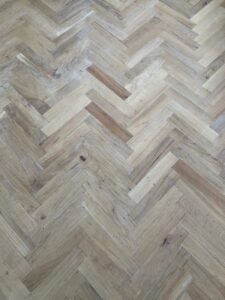
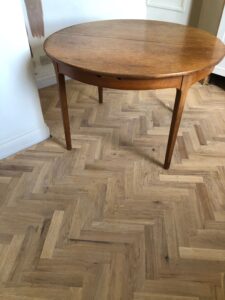
It was a longer process than we envision and often felt never ending, but my goodness do we love the result! For a full kitchen reveal, see here!